10 Food Styling Tips to Make Your Food Photographs Delicious
I am speaking at the first annual Keen Digital Summit today and if you are going (spoiler alert!) this is my presentation. I have been asked to talk about food styling so I thought that I would put together a list of 10 really easy tips to help your food photographs look delicious. I thought it would be great to post here on the blog because this is not only for you food bloggers out there but also for any and everyone that takes pictures of food—you know that you've posted a dozen on Instagram!
These tips will help you take pictures of an incredible dish at your favorite restaurant, document your own recipe adventures or get that perfect shot of your dad carving the turkey at Thanksgiving.
I have styled all of the photos in this post and photographed most of them (unless credited otherwise).
1. Make it Look Appetizing
This seems obvious but sometimes making something look appetizing is harder than you think. Don't take a photograph of something that looks gross—plain and simple. I was asked to photograph an oyster casserole for an advertisement one time—if it doesn't look like you want to lick the plate in person, it certainly won't on camera (and that oyster casserole definately didn't). Think about recipes and dishes that not only taste good but look "pretty enough to eat."
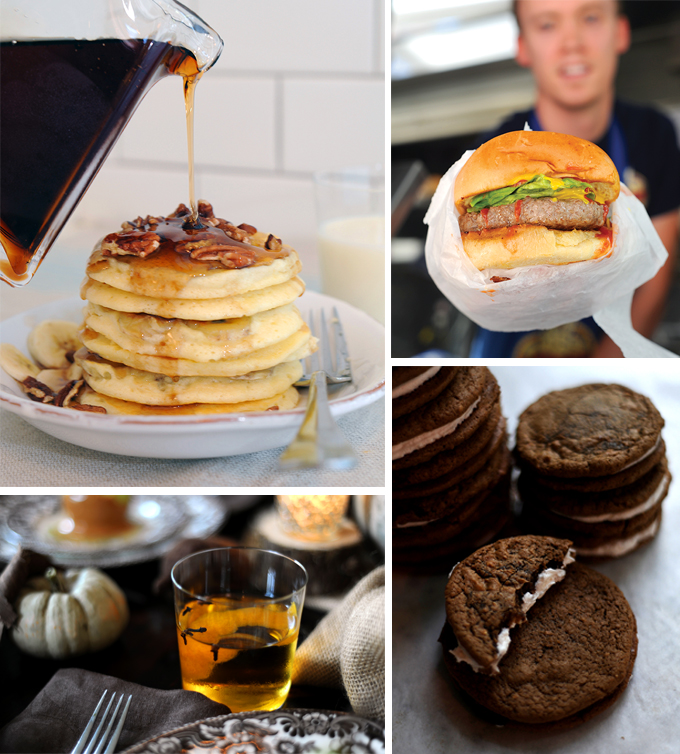
Find the "yum" factor when photographing food. What makes this dish delicious? Is it syrup dripping down the side of a stack of pancakes or the gooey marshmallow filling of an oatmeal cream pie? Capture that.
2. Shoot the Process
Sometimes the ingredients are just as beautiful as the final result. Take the time to photograph a recipe as you make it. Lay out all your ingredients, mise en place, in a stylized way and shoot them. Pay attention as you go to the things that look amazing—I LOVE the way that whipped cream looks on the end of a whisk, a piping bag full of icing or a pomegranate broken open right before you remove the seeds.
If you are photographing in a restaurant , look around. A lot of the time the ambiance is just as cool as the food.
3. Food Prep Tips
There are a couple food preparation tips that you can steal from the food styling experts and use at home. One is to undercook your food. As food cooks it looses moisture and shrinks as it cools. You can always color too-light areas or apply heat with a kitchen torch or finish something under the broiler … you can't "un-cook" something.
Food photographs better at room temperature. Let your dish cool before you shoot it. You can use a basting brush to brush the edge with oil so it glistens like it just came out of the oven. Spritz the lettuce of a salad with water (trick to make it look ultra fresh) or dust something with salt at the last minute.
Less is more. Sometimes a couple of slices of pizza looks better than the entire pie. An over crowded plate is less appealing than a minimalist spread so use less than you normally would.
Remember the "Rule of Thirds." Details and objects that are arranged or grouped in odd numbers are more appealing, memorable, and effective than even-numbered pairings. 5 macaroons are better then 6. Really.
4. Elevation
One of my very favorite tricks is the stack items to create elevation. A sandwich cut in half and then stacked on top of itself is so much more interesting than one from overhead. I often use skewers and tooth picks to achieve this effect (and am also really good at Jenga).
Often food stylists will use mashed potatoes (yep, just the gross instant mashed potatoes) to create a mound in the center of the plate and then build the dish around and on top of it. It makes a salad go from a flat bowl of lettuce to a mound of ingredients on display.
5. Garnish
Make sure you plan for the use of the appropriate garnishes. Have herbs, lemon or limes, or extra ingredients to use if needed. If you are making butternut squash soup, save and toast the squash seeds to garnish the top. Next time you're out for a drink, pay attention to the cocktail garnishes and use the technique at home.
Garnishes make your dish look finished and professional.
6. Props
Choose dishes, surrounding props and backgrounds that compliment your food. I love to use varying textures and always try to coordinate color combinations.
You don't have to own thousands of expensive place settings to achieve different looks. I love to buy random dishes and table linens at flea markets and garage sales. You can get one misplaced napkin at a store like Anthropologie on sale for less than $2 and in a tight shot no one will know that you don't own the other 11 to match. You really don't even need dishes … use a piece of wood, cutting board or marble tile.
Borrow, borrow, borrow. I borrow items from my mom's collection all the time. Stores will even sometimes let you borrow items for photo credit if you just ask—they love the exposure!
My favorite prop? People! I love to shoot someone holding a plate (or an ice-cream cone at Honey's). Sometimes using the human form makes the dish more accessible to the viewer—like it's being handed to them right out of the frame.
7. Natural Light
Food, just like people, look best photographed in natural light. Push your food up next to a window and use a sheer curtain to diffuse the light. You can even use a white cutting board or piece of paper as a light reflector. Just remember not to mix light sources. If you are using natural light do not use a soft box and/or flash too.
Sometimes it is difficult to shoot in natural light (especially when I cook at night). If possible, save your food and photograph it the next morning (baked goods are easy to do this with as they hold up well). When that is not possible, use a soft external light source (like a soft box) or bounce a flash (never use a direct flash) and ALWAYS use a tripod.
When making photographs on your phone, never use the flash (I don't think I've even turned the flash on my iPhone on). If you are taking a picture in a dark restaurant, use something like an empty glass to hold your phone really still (a make-shift tripod).
8. Shoot Different Angles
When plating your food, keep in mind what angel it will be shot at and style accordingly. The three key angles to shoot food at are: overhead (looking strait down onto the plate), 45 degrees (like you are sitting down getting ready to eat it) and straight on (get down on the same level as your plate).
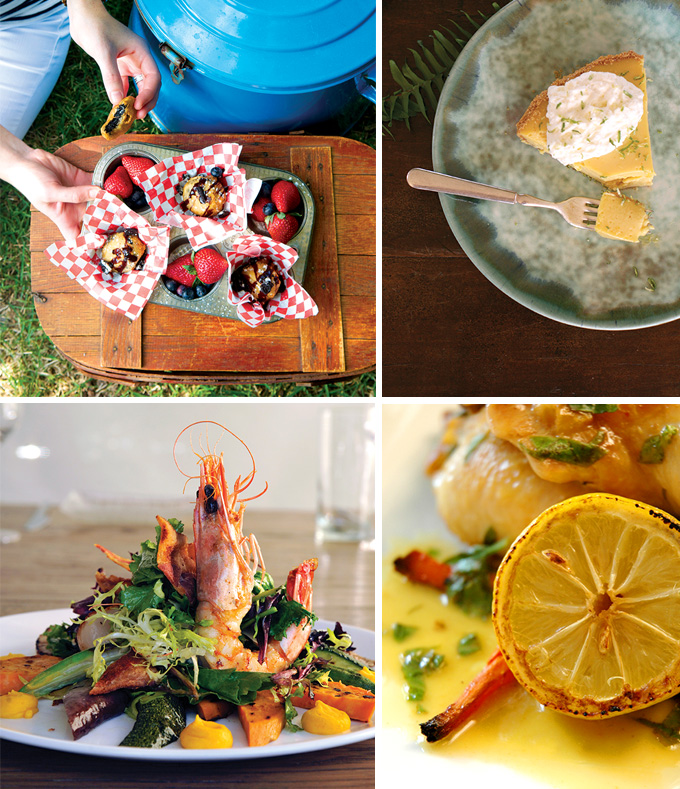
I usually shoot all three angles every time if I can, making minor adjustments to my dish as I go. It's also nice to zoom in really close to your dish and highlight some of the key ingredients. Something like a charred lemon can be just a garnish in a wide shot but can be the main attraction in a close-up image.
9. Take a Bite Out of It
My very favorite thing to do when shooting and styling food is to take a big bite! Not only because I love to eat … but really because it makes your dish so much more engaging. You want your audience to feel like they can reach into the frame and grab a bite.
Once you think that you have the shot that you want, take a fork and dive in. Mess it up a little and then reshoot. After spending so much time to make a dish look perfect, often times it is the photo where things get a little messy that are my favorite.
10. Look for Inspiration
There are so many great food stylists and photographers out there. Keep your eyes peeled for photos and styles that you like and use it in your own photography.
My very favorite food stylist is Donna Hay (she is like the Martha Stewart of Australia). Her magazines and books are incredible—look her up when you get a chance. donnahay.com.au
Make a Pinterest board of your favorites and take note of why you like them.
Learn more about the Keen Digital Summit and the other ultra-talented speakers participating this year by clicking HERE.


